How to Set Up a Chafing Dish
The Complete Step-by-Step Guide for Perfect Buffet Service
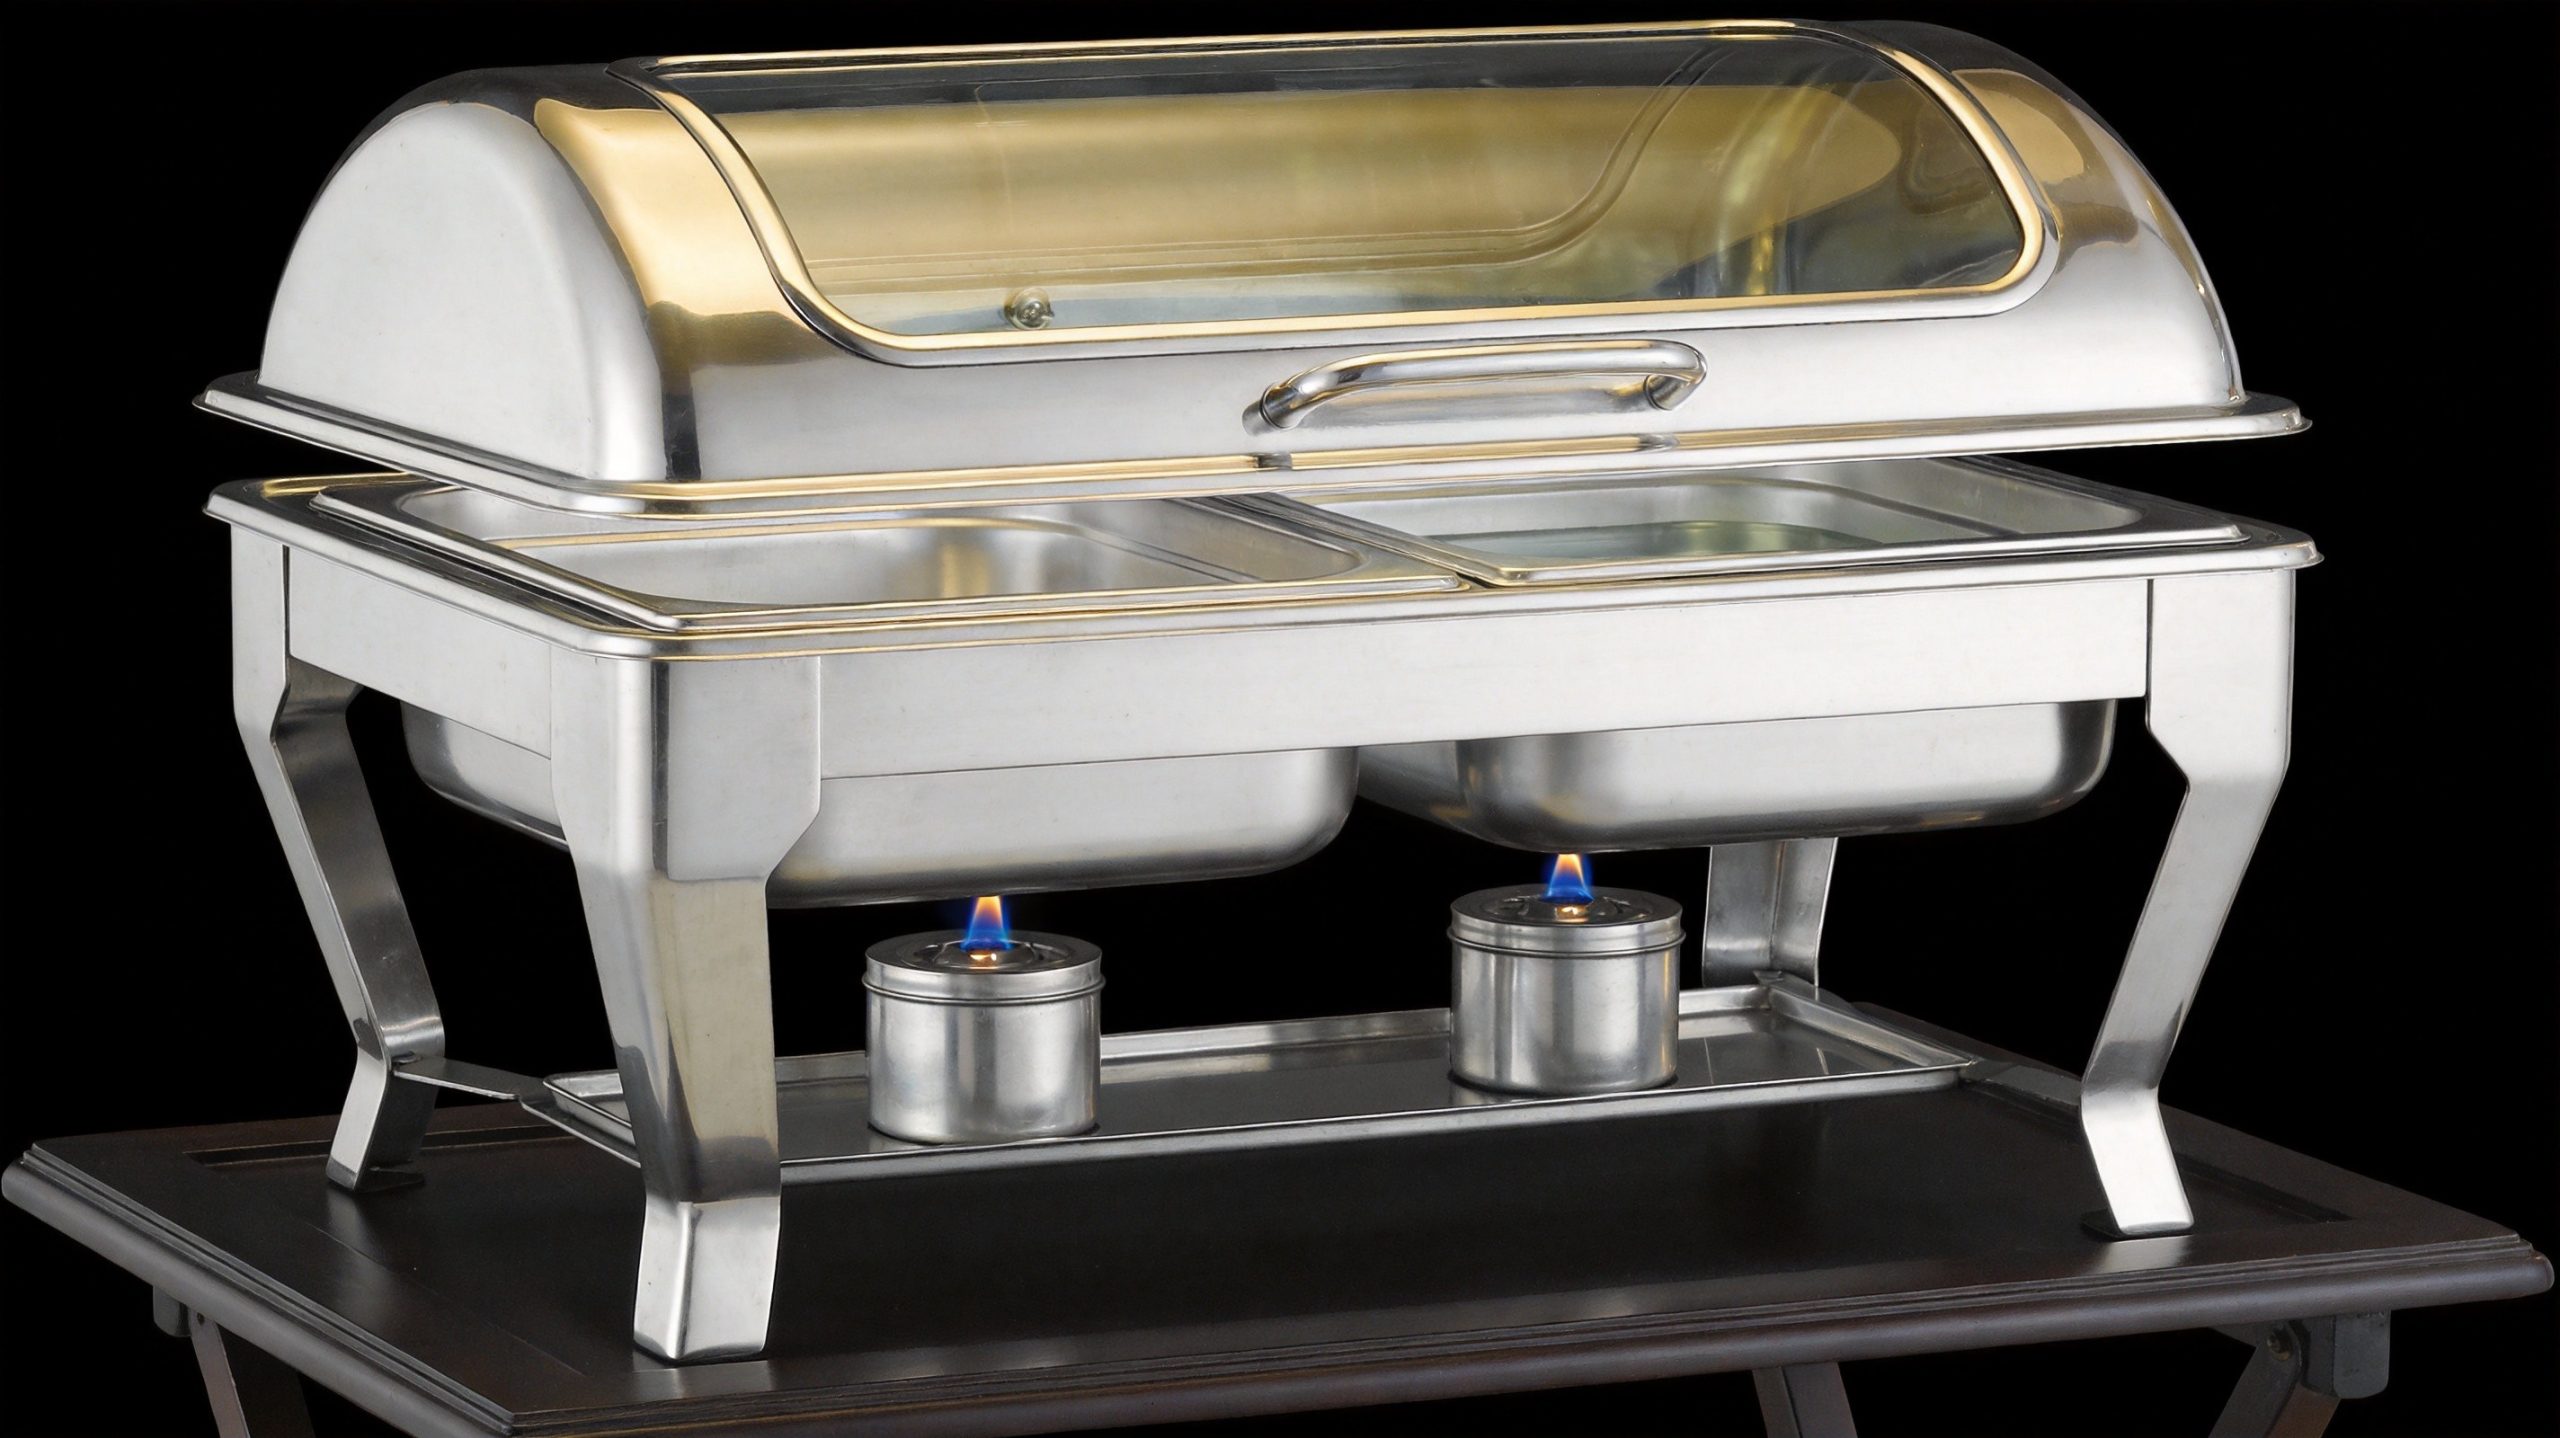
Know Your Chafing Dish
Before setup, familiarize yourself with the key components:
| Component | Purpose |
|---|---|
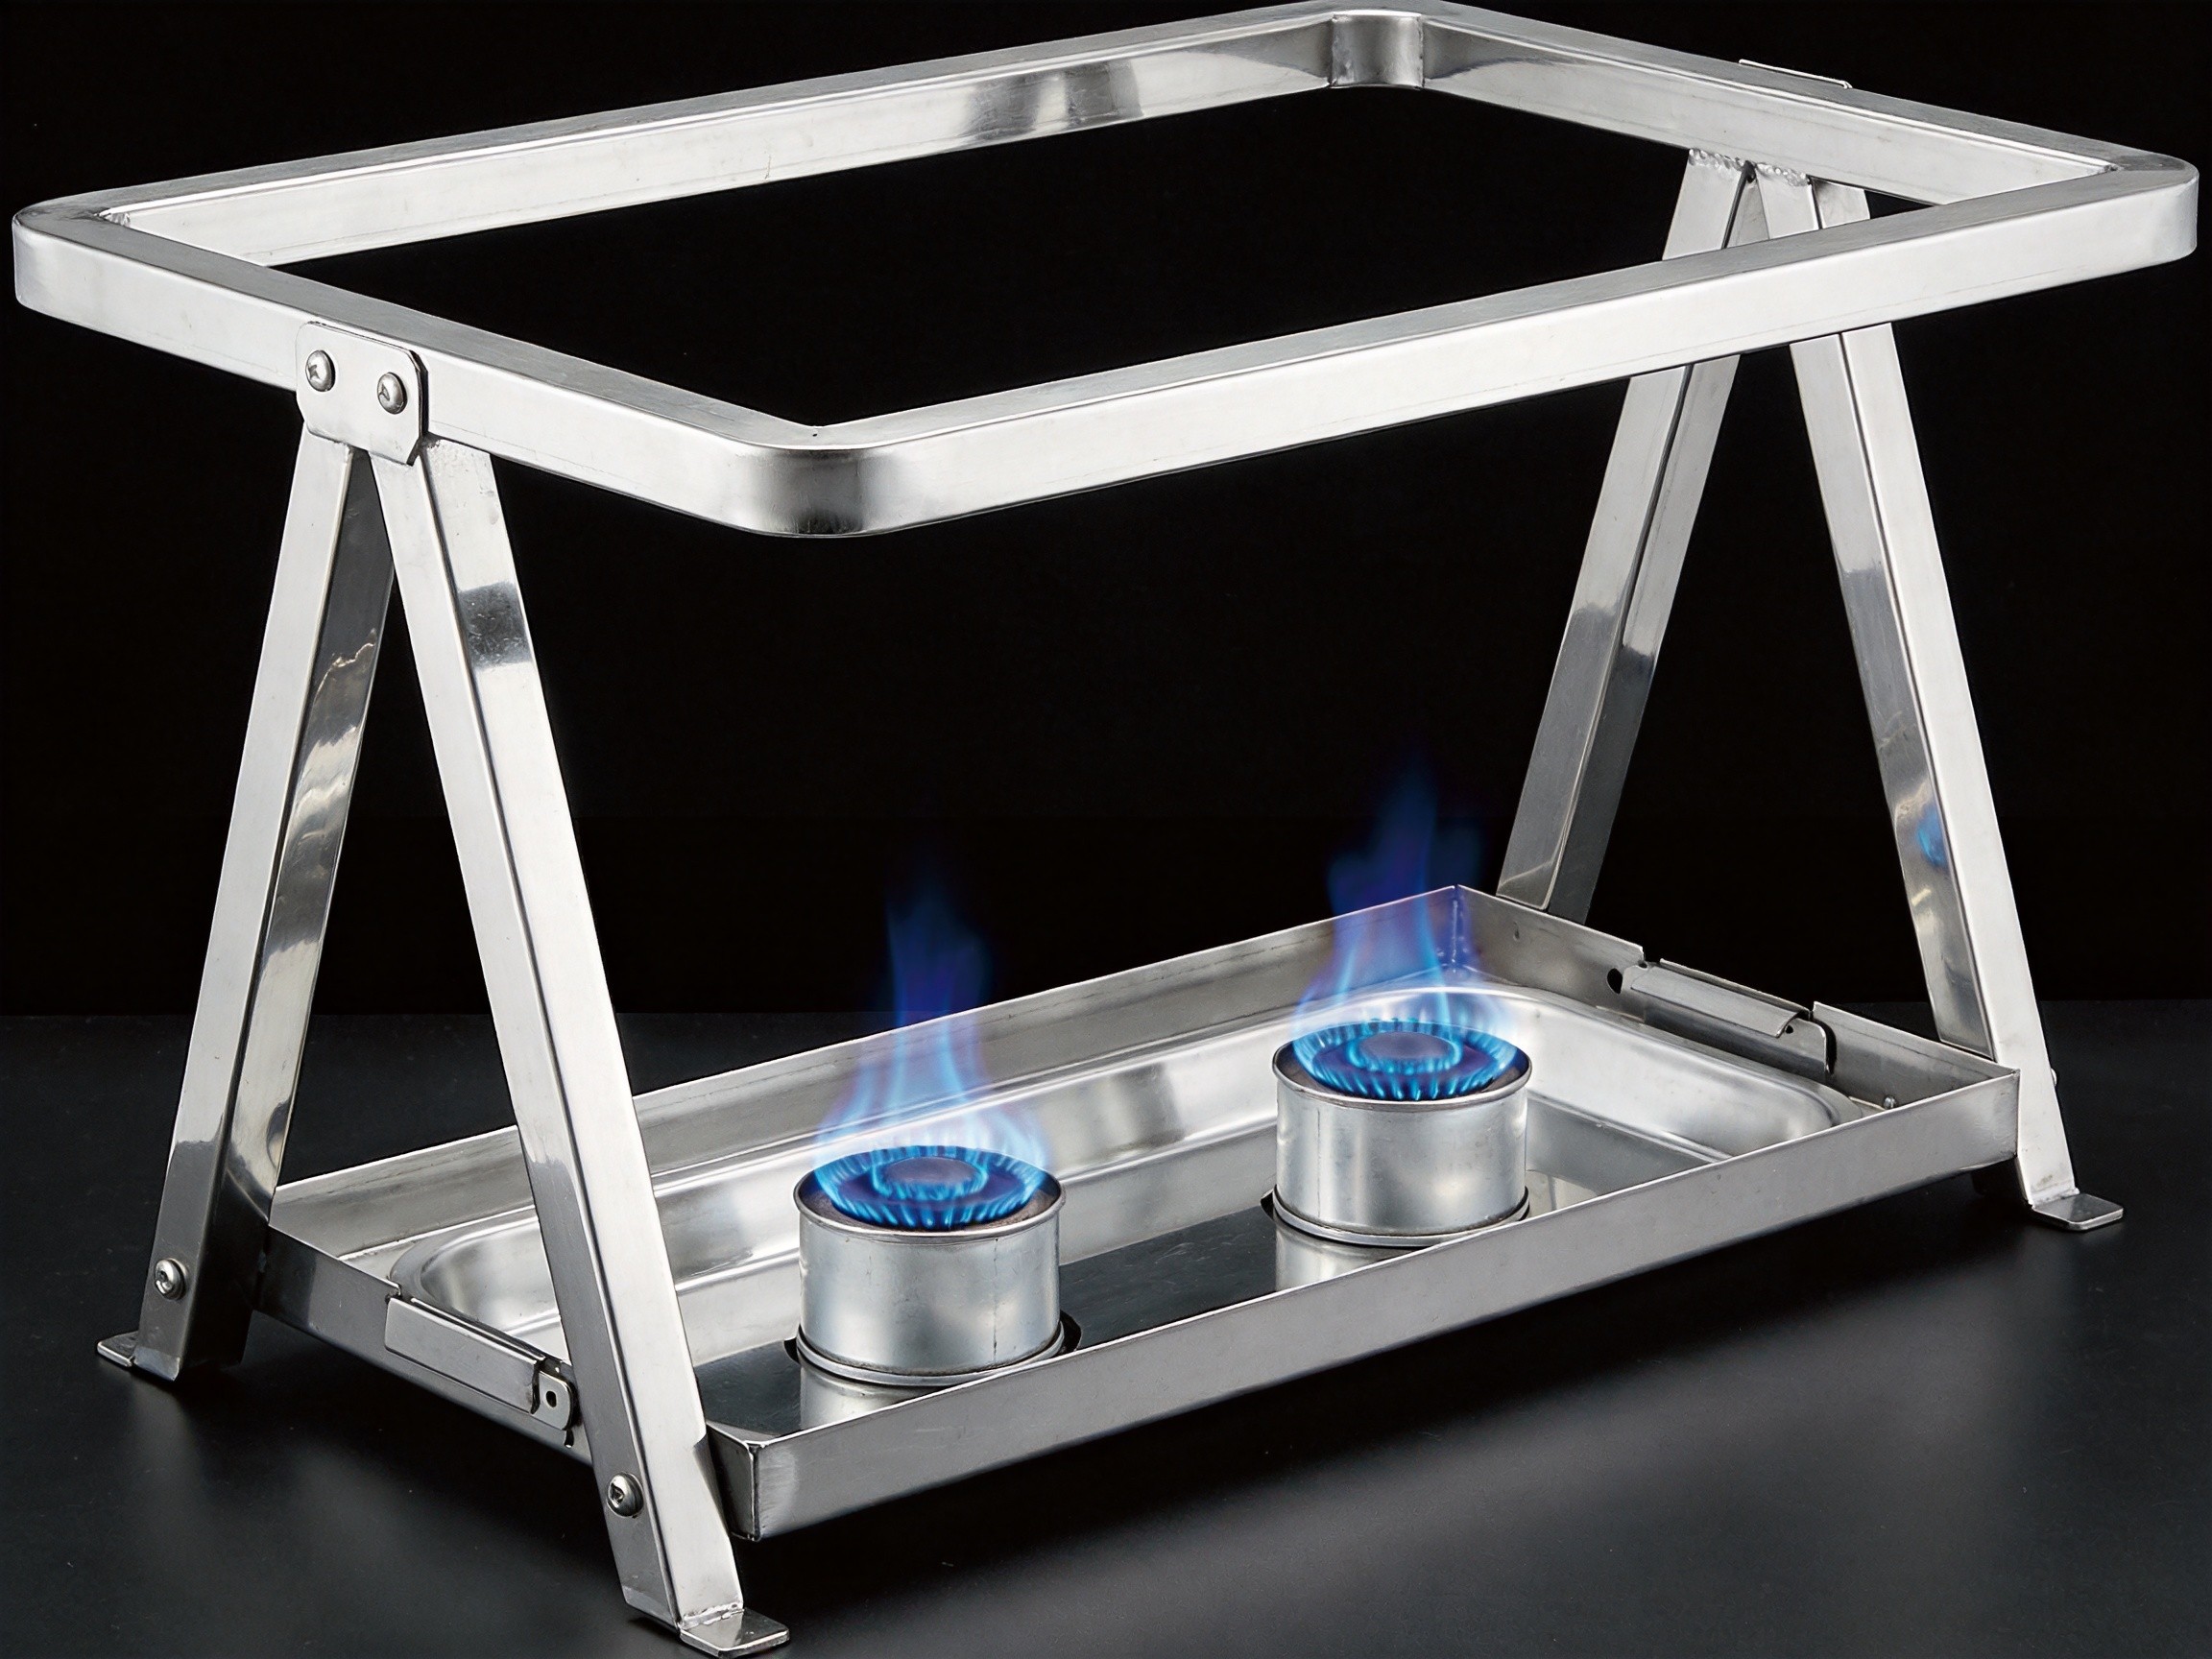
| Frame / Stand | The base structure that supports all other parts |
| Water Pan | Holds hot water to create a gentle, even heat bath (bain-marie) |
| Food Pan (Insert Pan) | Holds your prepared food; sits inside the water pan |
| Fuel Holder | Securely positions the chafing fuel canister beneath the water pan |
| Lid (Roll-Top / Dome) | Retains heat and moisture; protects food from contamination |
| Fuel Can | Provides the heat source (gel fuel, wick fuel, or electric) |
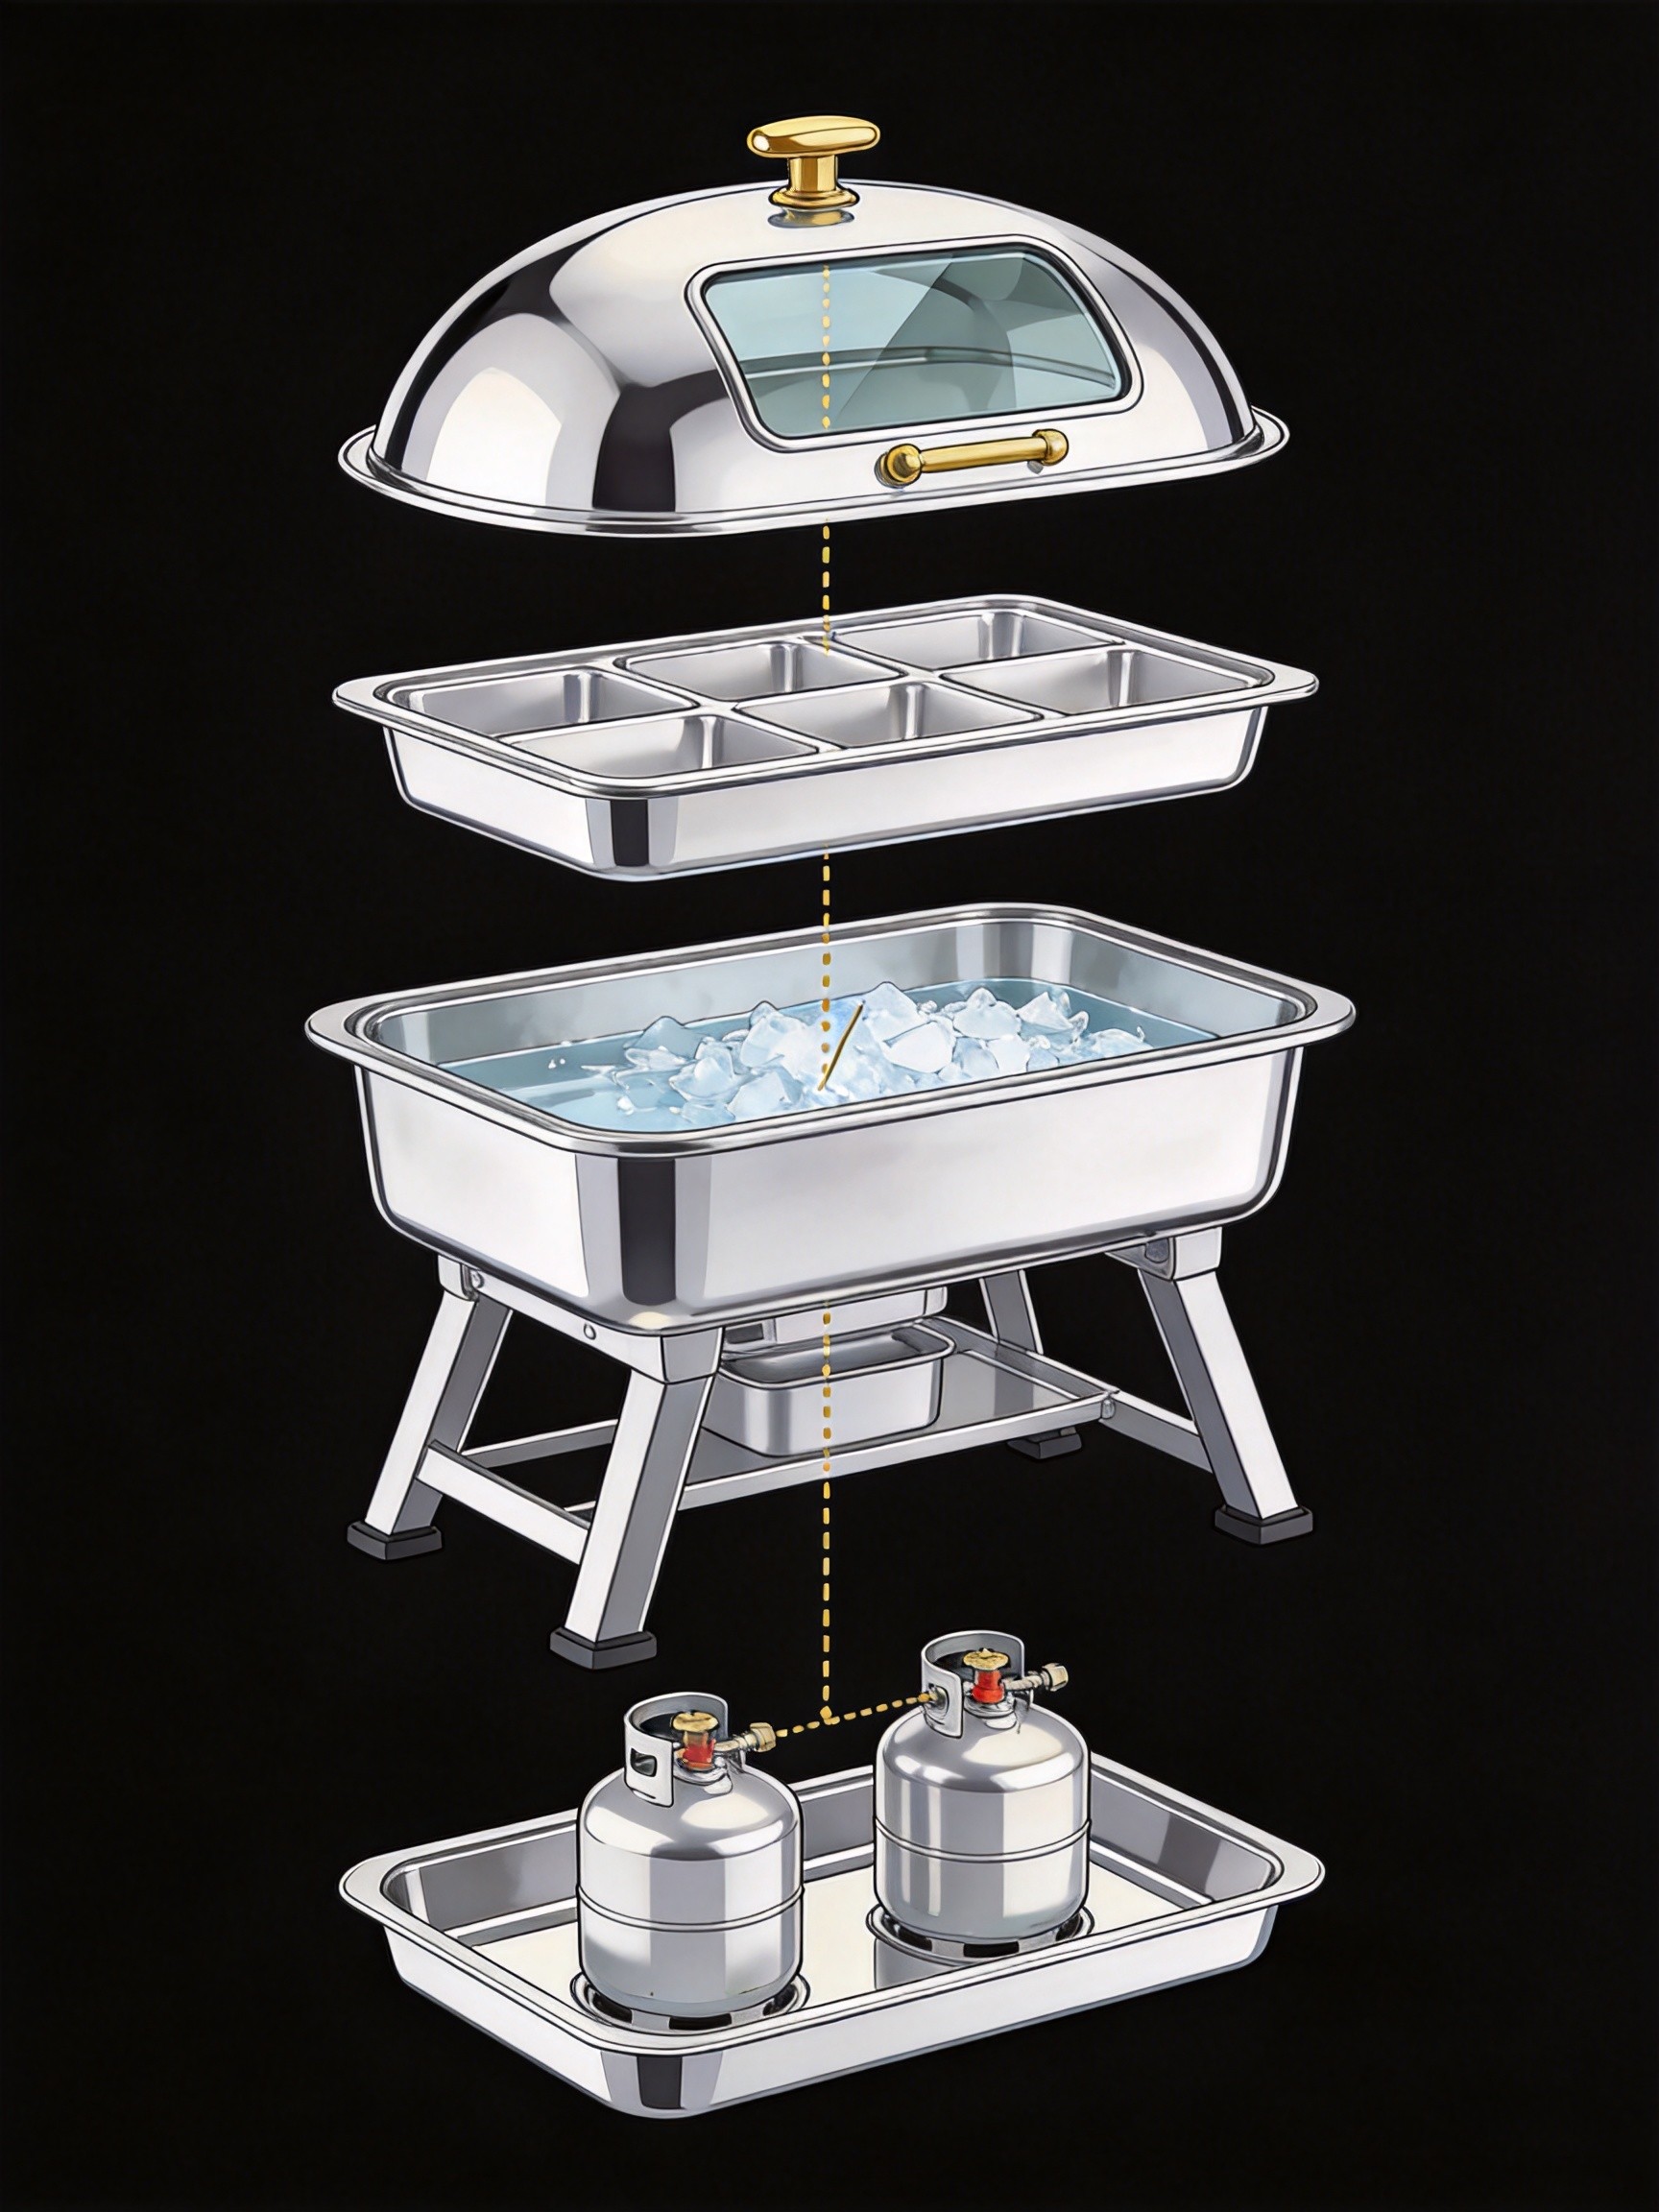
Step 1: Position the Frame
Place the chafing dish frame on a stable, heat-resistant surface — a buffet table, serving cart, or countertop. Ensure it sits level and firm. Leave at least 6 inches of clearance between units for safe operation and easy access.
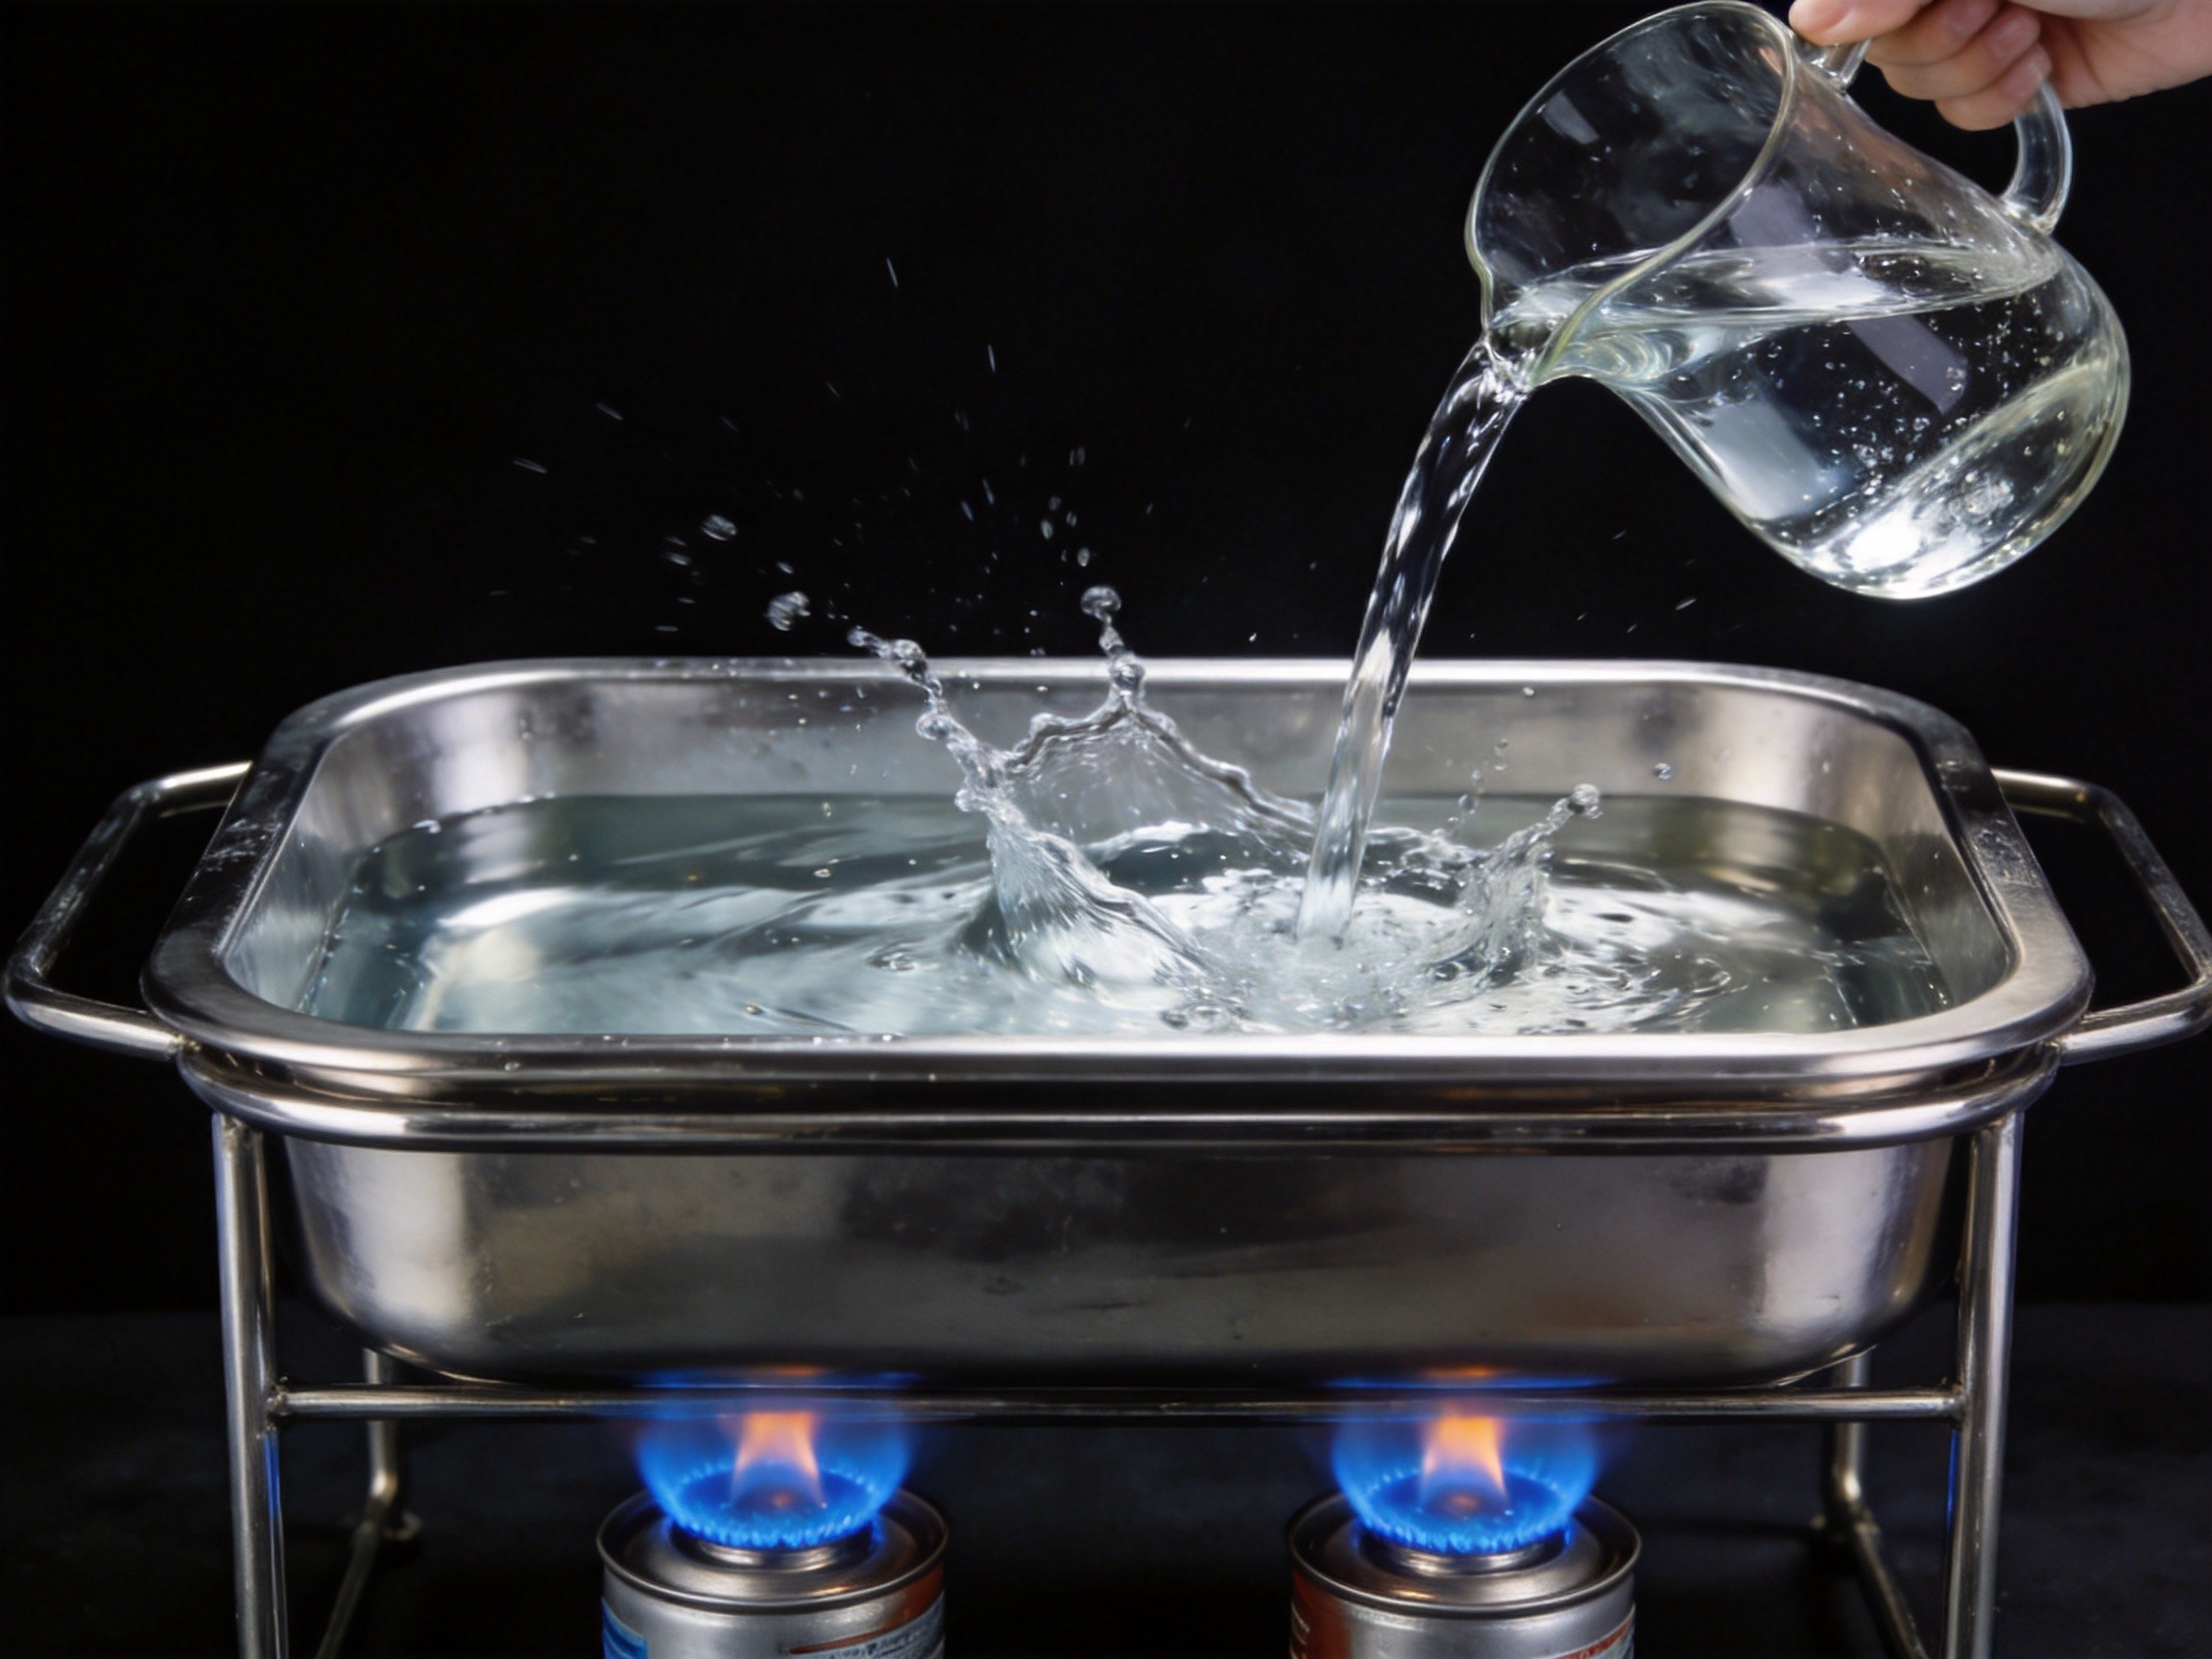
Step 2: Add Hot Water
Insert the water pan into the frame and fill it with hot water (not boiling) to a depth of about 1 inch (2.5 cm) — roughly 2/3 full.
Why hot water? Starting with hot water dramatically reduces preheating time and conserves fuel. Cold water can add 15–20 minutes before your food reaches a safe temperature.
Step 3: Place the Food Pan
Always pre-heat your food before placing it in the chafing dish. Chafing dishes are designed to maintain temperature, not to cook or reheat cold food. Your food should already be at its proper serving temperature (at least 140°F / 60°C).
Carefully place the food pan into the water pan. It should fit snugly to minimize heat loss — gaps allow steam to escape and reduce efficiency.
What fits in a chafing dish?
| Food Type | Works Great? | Notes |
|---|---|---|
| Pasta, rice, casseroles | ✅ Perfect | Stir occasionally for even heat |
| Roasted meats | ✅ Perfect | Slice before placing for better heat distribution |
| Soups & stews | ✅ Great | Use deep pans (4–6 inch) |
| Fried foods | ⚠️ Use with caution | May lose crispness; serve quickly |
| Cold salads | ✅ With ice | Fill water pan with ice instead of hot water |
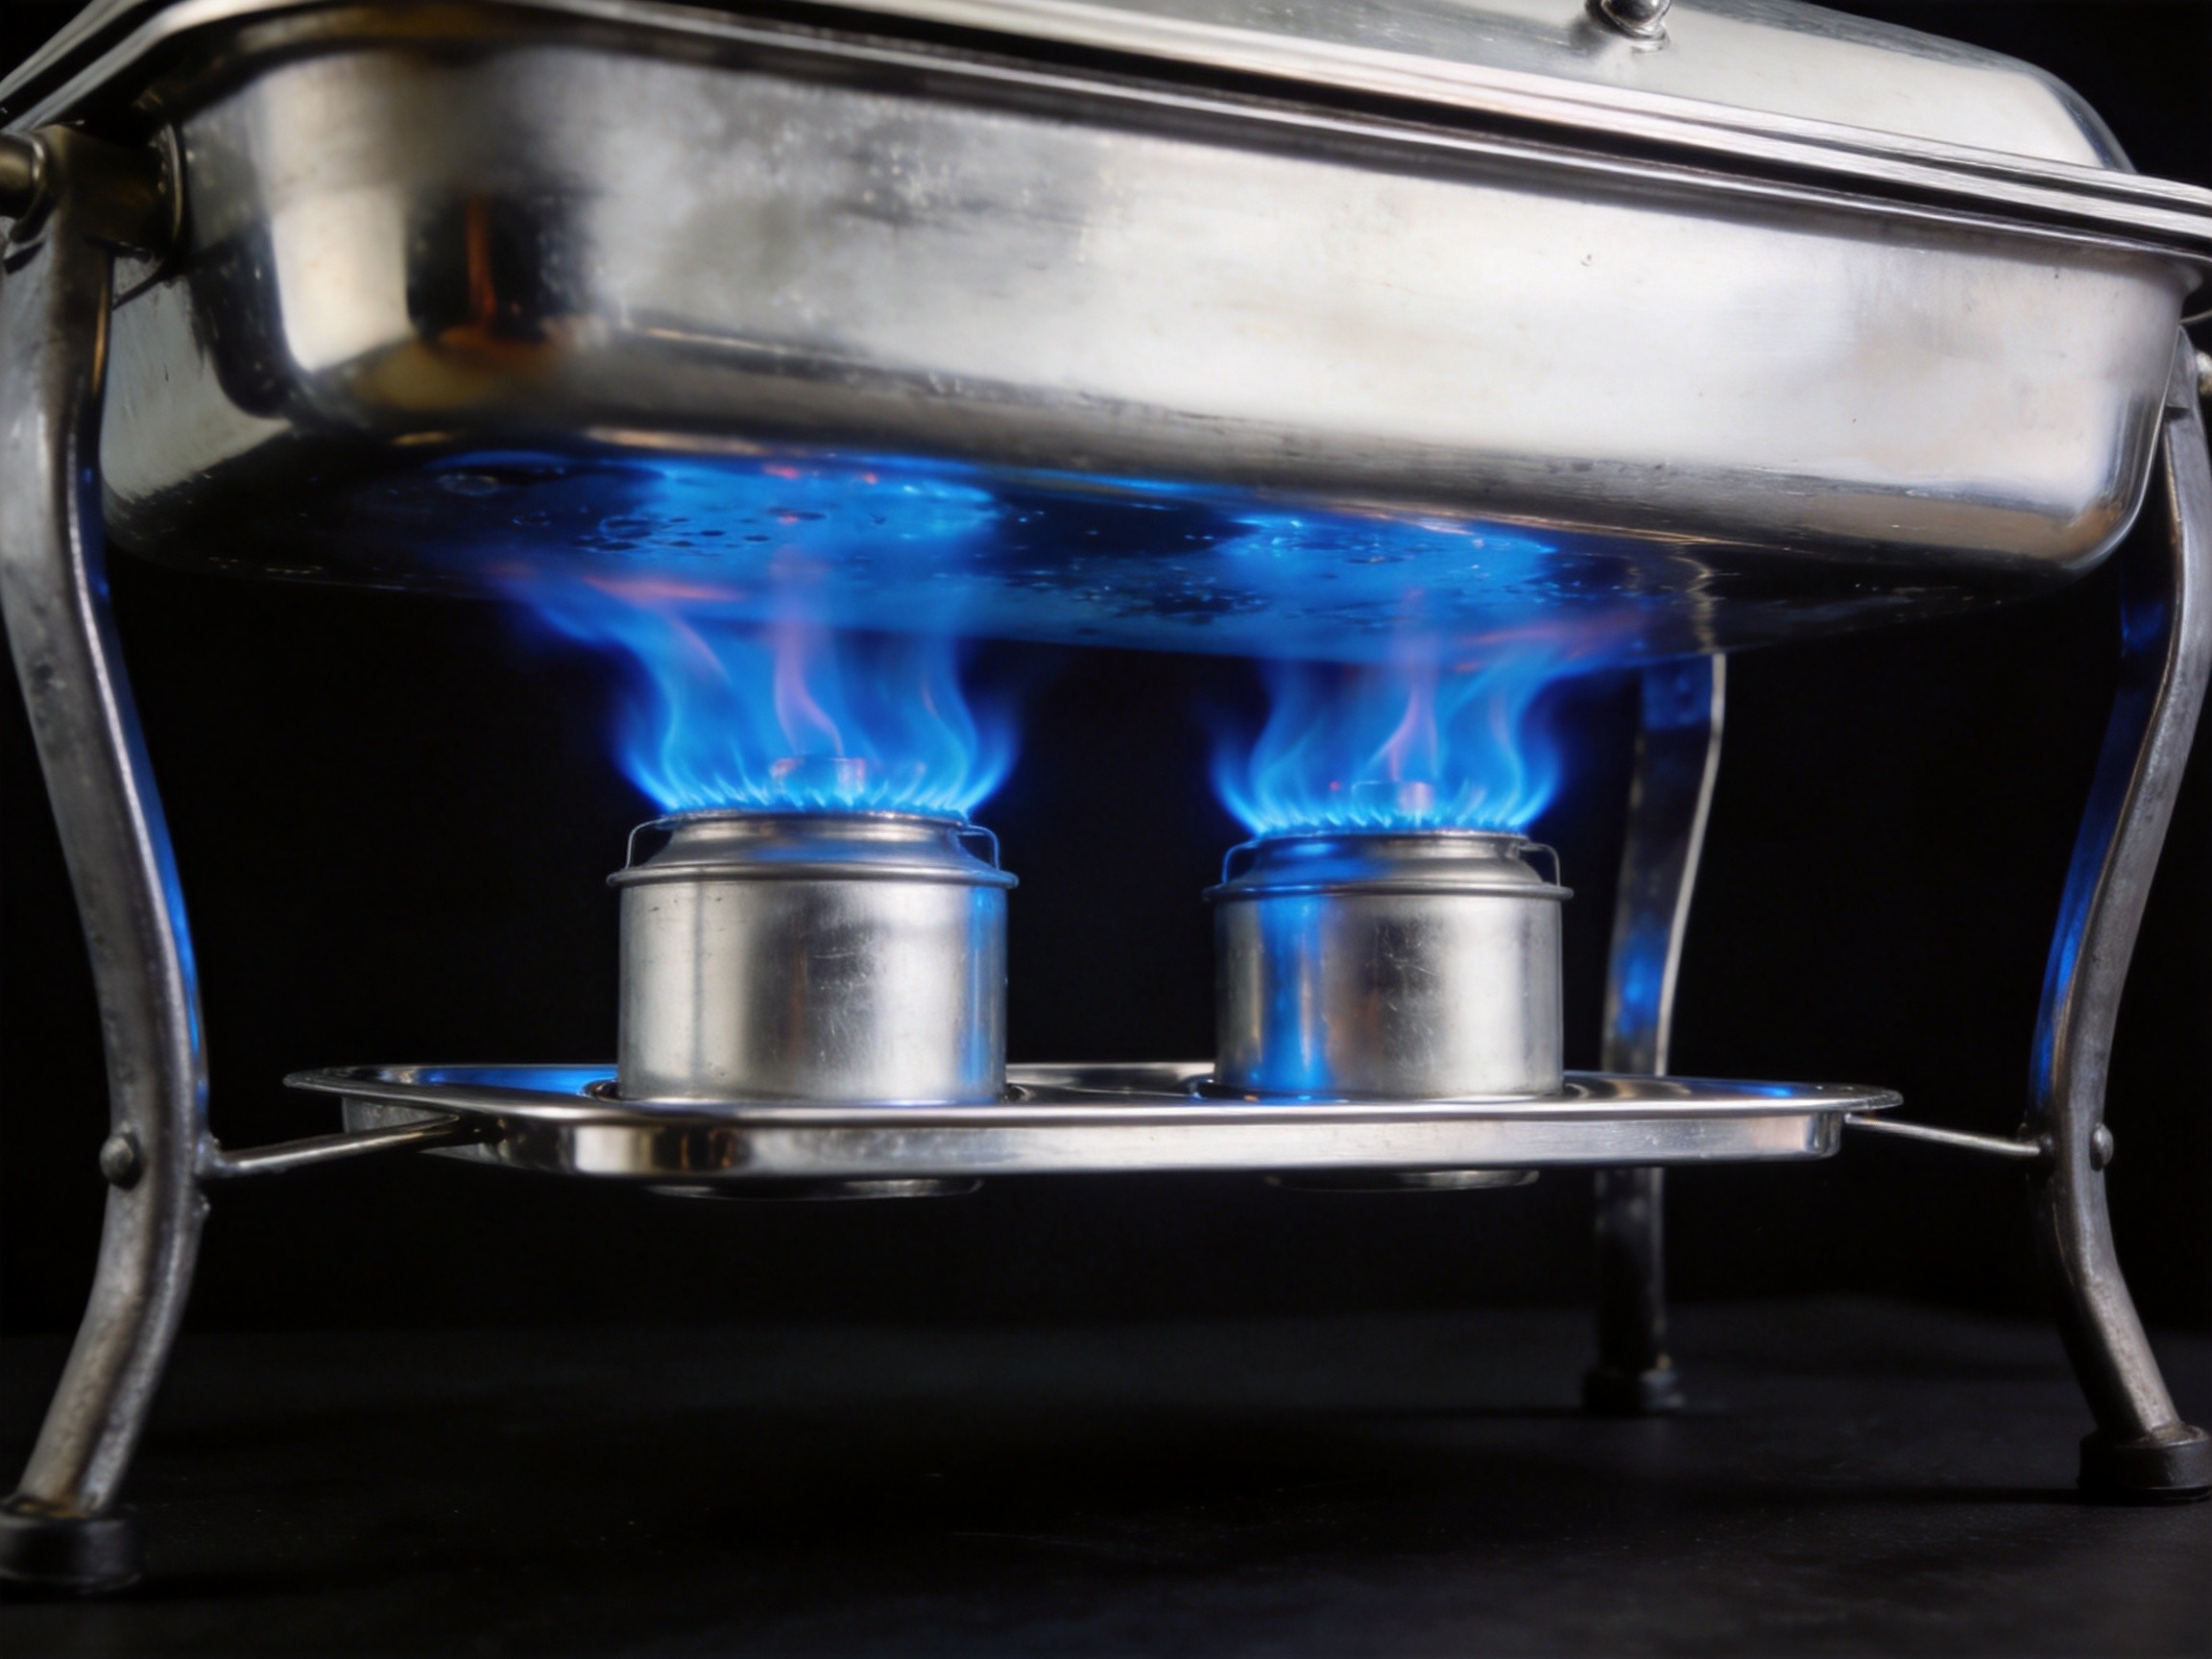
Step 4: Light the Fuel
For Gel / Wick Fuel Models:
• Only use chafing fuels (ethanol gel, methanol gel, wick fuel). NEVER use liquid fuels that could spill.
• Wear heat-resistant gloves when handling the fuel can.
• Light the fuel after the water pan and food pan are in place to avoid accidental burns.
• Keep a fire extinguisher nearby.
For Electric Models:
Step 5: Cover & Monitor
Close the lid to retain heat and maintain a consistent temperature inside. The lid is your best friend for:
Only open the lid when serving — every time you lift it, you lose heat.
Temperature Monitoring Guide
| Food Type | Minimum Safe Temp | How to Check |
|---|---|---|
| General hot-held food | 140°F (60°C) | Insert thermometer into thickest part |
| Poultry | 165°F (74°C) | Check center of thickest piece |
| Whole cuts of beef/pork | 145°F (63°C) | Allow 3-minute rest time |
| Ground meats | 160°F (71°C) | Check multiple spots |
Fuel Reference: How Long Does It Last?
| Fuel Type | Burn Time | Best For |
|---|---|---|
| Gel fuel (standard) | 2–3 hours | Short events, small gatherings |
| Wick fuel | 4–6 hours | Longer events, steady heat |
| Electric | Continuous | All-day service, indoor venues |
Replacing fuel safely:
Keeping Food Cold in a Chafing Dish
Chafing dishes aren’t just for hot food! To keep cold items chilled:
This works beautifully for seafood displays, fruit platters, desserts, and salads.
Cleaning & Care
After your event:
Quick Setup Checklist
This guide is for informational purposes. Always follow the manufacturer’s instructions included with your specific chafing dish model.